-
 Librarian Pro 8Version 8.1A personal home-inventory app for books, movies, music, software, video games, board games, beverages, and more. Scan barcodes or search online to auto-fill details and cover art, track locations and loans, and find anything fast.View Downloads Buy Now
Designed for Collectors
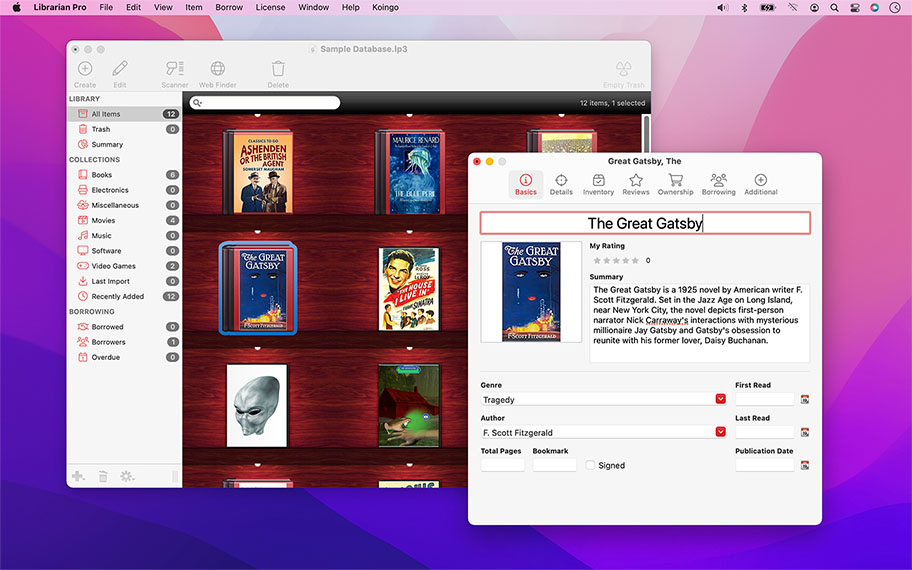
We all collect something, whether it's stamps, movies, games, music, books or wine. Librarian Pro brings sophistication and class to managing your collection! Browse all of your items at a glance on a virtual bookshelf, in a list, or in cover flow.
Item artwork and information is easily and automatically downloaded from the web. Even track which items you have lent out to friends; or, for small businesses, go as far as recording late fees and due dates.


This system keeps track of all previous data you've entered and will offer suggestions as you type!
View a summary of all of your library items at once. Viewing charts that outline the total value of items in your library, genres, actors, musicians, and literally any other value you've entered!
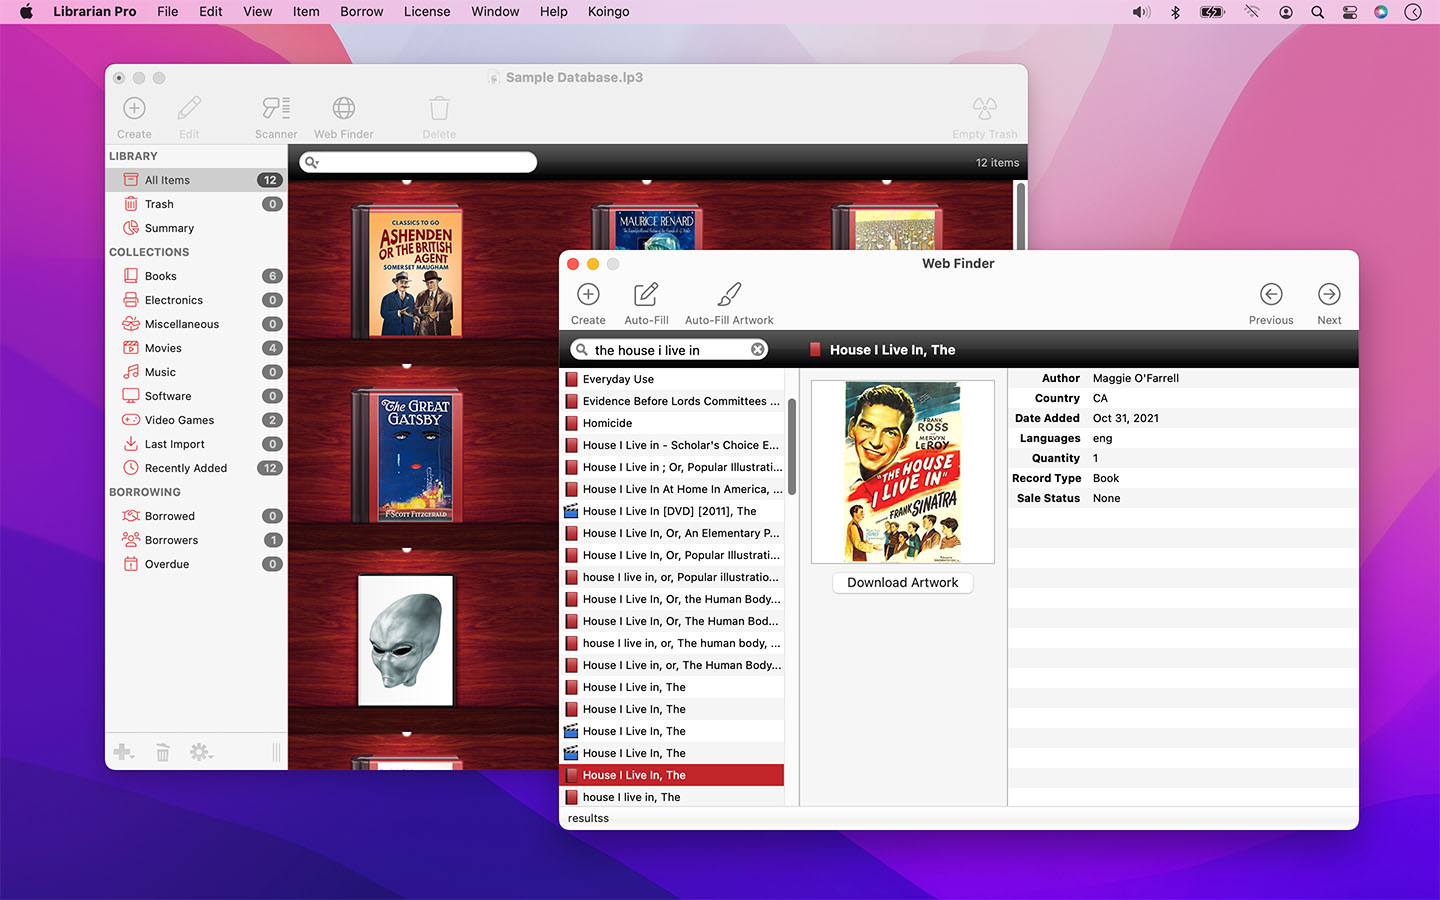
With as little as a barcode or item title, Librarian Pro can scour the web and find all matching items and fill in the missing details. From cover artwork to the list of tracks on an album or even the full list of cast in a movie.
Complete Inventory Control
If you are managing a full inventory of items for sale on eBay, or using Librarian Pro to track which friend borrowed which movies, the power-user features in Librarian Pro will make your life a breeze.
Taking full advantage of optical recognition technology, use your web cam or physical barcode scanner to add items to your library or manage inventory. Mark items as lent out to specific users, track in your computer's calendar, automatically send e-mails or display alerts. Even manage late fees and due dates.
Other Highlights
Detailed
Pre-defined item types that come with a variety of fields to enter all information you could ever possibly desire.
Collections
Create smart collections that automatically include items based on a set of criteria you specify. Want to quickly view all movies with Christian Bale? Done!
Import & Export
Easily import from our competitor's titles and other common file formats. Export for easy viewing as a web page or into our Data Guardian app!
Multi-Database Support
Create an unlimited number of databases: one for each collection you own!
Isolate Duplicates
Easily identify and delete duplicate library items.
Mac & PC Compatible
One database will work on both your Mac and PC.
Auto-complete
Auto-complete helps speed data entry by remembering entires for other items.
Barcode Scanning
Use your web cam or physical barcode scanner to add items or update inventory.
Beautiful
View as a list, as a bookshelf, or in cover flow mode.
Borrowers
Track item lending and charge late fees.
Calendar
Track lent out items in macOS' Calendar app and send reminder e-mails or display alerts.
Cross-platform
One database works on both Mac and PC.
Details
Fill in countless details about items ranging from tracks on an album to the illustrator for a book.
Duplicate Filter
Easily isolate and display duplicate items.
Export
Export to the web and a variety of other formats.
Import
Import from text, CSV, iTunes, 'pedias, Delicious Library and more!
Multi-Database Support
Create an unlimited number of separate databases.
Reviews
Write internal reviews.
Sales Tracking
Record detailed purchase and sale information for items, such as purchase location, price, original value, used value, item URL, AND MORE.
Smart Collections
Automatically sort items by specific criteria.
Statistics
View a summary of all items in your library to compare prices and more.
Web Auto-fill
Integrates with numerous web sites to automatically download item information.
For the full or demo version of our app, please use the download links below. After installation, the demo will automatically begin. For existing owners, unlock the app via the "Unlock..." menu item.
Current Version
All current versions of Koingo apps are compatible with the latest version of macOS or Windows (when applicable), Apple Silicon, support 64-bit architecture, and are optimized for Retina (HiDPI) Display. These retail versions of our apps are intentionally not sandboxed to provide the most flexible user experience. For sandboxed versions, see our App Store editions.
Librarian Pro for PC
Version 8.1
Released March 8, 2026
Windows 10 (1903 from May 2019) or later
Older Versions
These versions are no longer supported and are listed primarily for customers with older licenses.
Mac Edition
- Minimum OS: Mac OS 10.7
Mac Edition
- Minimum OS: Mac OS 10.6 (Intel)
I have been using librarian pro for a very long time. As a clergywoman I have an extensive library of books, both professional and personal. This is like having a card catalogue of my library at my fingertips. I am also able to see what I have of various collections so that I don't re-purchase what I already have.

Rev. Debra Jene Collum
I love how you can just straight-up scan things in with the barcode scanner. So simple and friendly. Delicious Library is a thing of the past for me after using this one. I think I need to settle down 'cause I'm about to go and recommend this to everyone I know at this rate.
Kelly Nethers
Its the best software for my library. Had quite a number of different programmes, but this one beats the rest.
Jörg Erhold
Librarian Pro is one program that I admire. Very easy to use and not complicated, making data entry a breeze !!
Santino
Helps me to never duplicate a purchase again. Keeps all my favorite authors together. Very good program.
Dawn Hayes
I have tried librarian pro and I am considering to put my data base on library, books, and articles best regards
pierre sohl
I have my own library of primarily religious books, as I teach Bible. Librarian Pro has given me a way to record what books I own as well as to know what the replacement value would (roughly) be. I have discovered I have a few rare books!
Jonathan Galloway
Great Product, lots of features, helps me keep our music library organized! Some of the saving features are a little redundant (make sure you save each file and then the entire library, or you'll loose those entries), but I like how you can have different smart lists and definable categories. If you're familiar with csv files, this integrates wonderfully with any existing libraries you have in Excel, or a similar program!
Corey Smith
Great stuff !!!
Michael Morangelli
Use it for my book collection. Generally like the app and its very flexible approach. Particularly liked the links to online data regarding books for quick entry using ISBNS
James Scully
All of our products come with a full set of licensing options: from single users and households to small businesses and larger corporations.
Personal Licenses
Student/Senior
-
1 computer2 unique devices per year
Solo
-
1 computer/user5 unique devices per year
Household
-
1 household10 unique devices per year
Business Licenses
School
-
1 school300 unique devices per year
Small Business
-
10 computers/users60 unique devices per year
Corporate
-
Unlimited10000 unique devices per year
Our manual is always expanding! While we strongly believe our products as so intuitive you shouldn't need a manual, there are exceptions now and then. If you feel there is something missing from the documentation, please contact us.
For a single-page listing of all help entries, click here.
| Version 8.1 – March 8, 2026 | |
|
Requirements This version requires at least macOS 11 (Big Sur from Fall 2020) or Windows 10 (1903 from May 2019). We have all older versions available for download on our web site. Please use the one designed for your operating system. A current, valid, license for any Koingo app will unlock all previous versions. |
|
| Upgrade Notes This upgrade is free for users owning the current major version, an active subscription, Utility Package Pro, or a "lifetime license." No action is required other than downloading the new version from our web site and unlocking as normal with an e-mail address. For all other users, orders for the current version can be purchased on our web site. |
|
| New Feature: | Undelete with right-click in main list. |
| Bug Fix: | Unable to click Unlock after demo expired from trial window. |
| Bug Fix: | Loading CSVs with macOS Roman encoding. |
| Bug Fix: | Entering an invalid date into date fields no longer crashes. |